[WP] Using Slide Markup Editor
Slide Markup Editor requires at least basic HTML knowledge.
Short video-introduction: http://youtu.be/7iIld0Z_wlc?t=1m50s

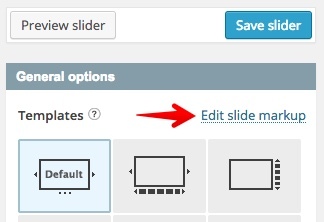
With Slide Markup Editor you can modify the base template of a slide. To enter it click on "Edit slide markup" in General Options of the slider. Correct HTML markup for slide can be found in documentation of jQuery version of plugin. Please note that all elements of the slider, like captions, thumbnails and tabs grab data from the slide markup, so make sure that they are included.
Note, that if you change template of a slide - slide markup will be changed to default too., so you can always "reset to default".
Lists of supported {{variables}}
About editor
Editor it's powered by Mustache template engine and supports everything what Mustache can do (like chaining and statements).
For example, the code below will output A tag only when {{link_url}} is defined.
{{#link_url}}
    <a href="{{link_url}}">Learn more...</a>
{{/link_url}}
Or when {{link_url}} is NOT defined:
{{^link_url}}
    This text will be displayed only when link_url is not defined.
{{/link_url}}
Variables in slide, like {{animated_blocks}} and {{html}} are only used for Custom Slider type.
Please note that there should be only one root element of a slide
If you wish to add your custom {{variables}}, please refer to this article.
Feel free to request a feautre
If you think that plugin is missing some tag, feel free to contact the support and request it.
Example 1 (custom caption)
To display the slide title and description inside the caption click on Edit Slide Markup in General Options to open the editor. And right after {{image_tag}} add such code:
<div class="rsCaption">
    <h3>{{title}}</h3>
    {{description}}
</div>
You may use any desired HTML markup. Full slide markup example:
<div class="rsContent">
  {{image_tag}}
  <div class="rsCaption">
    <h3>{{title}}</h3>
    {{description}}
  </div>
  {{thumbnail}}
  {{html}}
  {{animated_blocks}}
  {{#link_url}}
  <a class="rsLink" href="{{link_url}}">{{title}}</a>
  {{/link_url}}
</div>
More info in docs of HTML version.
Example 2 (custom thumbnail or tab)
Now let's assume that you wish to see "small image" + "title" in each thumbnail or tab. In Slide Markup Editor, instead of {{thumbnail}} paste the code:
<div class="rsTmb">
   <img src="{{thumbnail_url}}" />
   <h4>{{title}}</h4>
</div>
Tabs use the same rsTmb markup as thumbnails.
Example 3 (custom IMG structure with srcset)
To add an attribute to the image replace {{image_tag}} with actual markup of <img> element. For example, let's add srcset attribute to serve different image for high-dpi screens:
<img src="{{image_url}}" alt="{{title}}" srcset="{{large_image_url}} 2x" />
Please note that if you do not define rsImg class on <img> element, default JS-based scaling options won't work, but you can use CSS to align the image (here is an example of 'fit" scale mode implemented just via CSS).
More info in docs of HTML version.